
Geo-reference image
We need to geo-reference the background image created in this guide. In very simple terms, we want to make this image “spatially aware” and tell the program where in the world our farm is!
Open it up
Input reference points
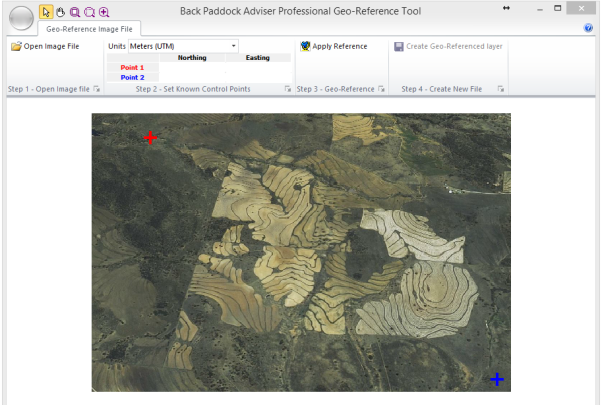
You will see a blue cross and a red cross on your screen. The Red Cross represents Reference Point 1 from Google Earth, while the Blue Cross represents Reference Point 2.
Hint: Zoom in on your image by clicking on the Magnifying Glass with a Plus sign in it, then clicking above your reference point, dragging your mouse down the screen
You will see now when you move your mouse around the screen; the E and N values will adjust accordingly. If your image appears "skewed", either too narrow or too wide, your coordinates for Reference points were not correctly matched. Ensure the red and blue plus signs match your initial placemarks in Google Earth exactly and re-do geo-referencing steps above.
Create layer and save
Your image file is now Geo-referenced, meaning that it can be spatially placed in your Mapping canvas according to its’ co-ordinates.
Please note: other files may be created as part of the geo-referencing process (for example .tab .jgw .prj files) please do not delete these, they are required.
Set as Background Image for Client File
We are now going to re-import the new Geo-referenced file and assign it as the background image for your Client File.
Import geo-referenced image


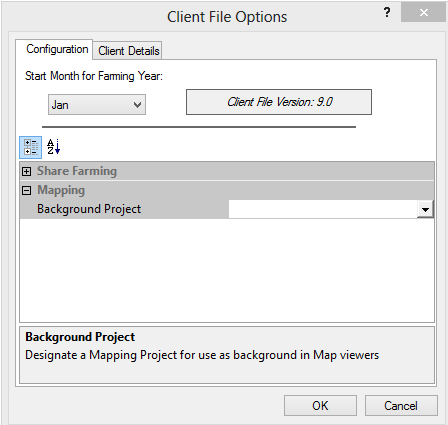
We are now going to make this your Default background image for this Client File.
Set as Background Image
Follow these instructions to draw your paddock polygons in the Adviser program, using the satellite image as a stencil.